Friday, November 30, 2012

DIY Baroque Tights

Photobucket


It has been very long since my last DIY Tights... now I remember why... bleeding fingers hahaha
But anyway, so this is what I have been doing the past week, my apartment looks like a DIY factory (yes, I made more diy'sssssss and I'm really short of calling them Die's haha) The tights took me a painstaking 16 hours to make mainly because I really wanted to make sure the tights would survive the laundry (like a 100 times) and it took me a while before I figured out the best way to work with the Baroque and Brocade trend on the tights and on other items (Placement, Prints and patterns) but I figured it out and the Tutorials are on the way!! I really hope you like them, it would be the best motivation ever to make more and don't worry, the tutorials offer serious alternatives to 16 hours of work ;)

xoxo

CLICK HERE for the TUTORIAL

Photobucket Photobucket Photobucket Photobucket Photobucket

FOLLOW COCOROSA ON BLOGLOVIN' FACEBOOK AND TWITTER

No Same Dress Fear

Photobucket
Photo's; Me by Alice Point and WishWishWish


I already posted my Asos Marketplace "No Same Dress Fear" look a few days ago but I really wanted to show you what the other bloggers who participated did, especially after reading the Brittish Elle article "The New Evening Wear" Basically the article added to my current Occasion Wear obsession where I am very intrigued by the idea of reinventing evening wear, the article called it beautifully  "the Downtown" effect where the old rules to evening gowns simply don't apply anymore (think the right matching accessories etc.) and while I still went for a short length dress the article talks mostly about the long length dresses like the dresses by Alessandra Rich and exactly that (Alessandra's vintage, one of a kind looking dresses) brings me to show you what Carrie, Valentine and Olivia did!


Wish Wish Wish

Carrie's Gold Crispy Taffeta-ish frock really gives that something special! I never thought I could love taffeta fabrics like this, and I never thought taffeta could look somehow modern and sophisticated but after seeing Carrie's post I'm all for seeing the use of these typical vintage fabrics again in these typical vintage hues!

http://wishwishwish.net/2012/11/gold-dust/

Photobucket


Hello it's Valentine

I really liked that Valentine went for a bold Victorian silhouette! and I love how she gave the "downtown effect" a new meaning by matching the dress fearless with boots while keeping hair and make-up polished! I'm actually really inspired by the idea of just tossing all the Evening Wear rules out of the window by what she did, I'm totally going to wear gowns with sneakers, just because!

http://www.helloitsvalentine.fr/2012/11/no-same-dress-fear.html

Photobucket


What Olivia Did

Olivia went for a longer length dress which she combined with flat shoes! I think too often we (Woman) feel obligated to wear high heels when it comes to occasion wear! I honestly don't think this look would have worked they way it does when Olivia had forced high heels to go with it! The Beehive, Red Lips and Pearls add such a perfect Retro Gloss to the look while the flat shoes keep that much needed modern spark!

http://www.whatoliviadid.com/2012/11/no-same-dress-fear.html


Photobucket


Me

hahaha so yeah, I was the only sucker who went for a short length dress but I did however (as also stated in the British Elle article) felt the need to do 2 things, I somehow had the dire need to cover myself up ("a bit sexy without being showy") and wanted to re-invent the party dress idea by combining vintage elements like the bow with lace with something modern and downtown cool like the heels and socks.

http://mypreciousconfessions.blogspot.nl/2012/11/cocorosa-for-asos-marketplace.html


Photobucket

FOLLOW COCOROSA ON BLOGLOVIN' FACEBOOK AND TWITTER

Wednesday, November 28, 2012

Alice Point + COCOROSA DIY Beanie's (+ tutorial)

Photobucket


Me and Alice combined forces last week in London for a fun little project, we were asked by MIISTA to brew up a DIY for the MIISTA blog (one that wouldn't take a million hours and bleeding fingers) and how could we say no? Especially since no bleeding fingers would be involved and we just love to Brew, although no brewing was involved either! We really wanted to pimp up our so necessary Winter Wear, Beanie obsession, anyone else?

Do check out THE FULL TUTORIAL and video on MIISTA.com! and do check out my partner in crime Alice Point!
xoxo

ps. No COCOROSAS and ALICE POINTS where hurt during the making of this tutorial. All added swag should be handled properly. ALICE POINT went on to live happily ever after, marrying a whole varsity team. COCOROSA eventually got the carpet (this Carpet) to fly.

Photobucket Photobucket

FOLLOW COCOROSA ON BLOGLOVIN' FACEBOOK AND TWITTER

Monday, November 26, 2012

OUTFIT: On Westbourne Park Road

Photobucket
photos taken by Alice Point


Me and Alice were on a mission on Westbourne Park Road, London and took some quick outfit photos, really quickly, like in a 5 min timeframe haha, luckily Alice has proofed herself to be an amazing Street Style photographer! As some might already know she's behind the London Street Style posts on the Miista blog which are really really good and inspiring but more about Alice and Miista later as our Mission was successfully completed ;) Anyway I'm wearing Blue again! Kind of like this outfit where I mixed it with black, to roughen up the feathers so to speak!
X

Wearing; Zara studded biker Jacket, H&M trend shirt, River Island shorts, Miista May Boots c/o Zalando.


Photobucket Photobucket Photobucket Photobucket Photobucket

FOLLOW COCOROSA ON BLOGLOVIN' FACEBOOK AND TWITTER

Saturday, November 24, 2012

All About Eye Lashes

Photobucket

After sharing my favorite Hair and Eyeliner tutorials (and my own Hair tutorial) I will move on to ...... the Lashes!

All I know is that when it comes to Eye Lashes you will have to go through a trial and error phase for sure (of course I'm talking about the Falsies) and I have seen Trial and Error in Falsies! I have seen it all from friends showing glue roots and to fake lashes hanging half way the cheek (I can totally imagine this happening on the perfect Date) But don't worry..  I did find some tutorials to live by!


1) Curl your Eye Lashes!

Curling your Lashes would be commandment number 1.
Did you know you can curl your eyelashes after applying your mascara? It's something a lot of people like to do for a look that stays all day (you would need to wait at least 5 min for the mascara to dry)

the secret to Lash Curling:
http://thebeautydepartment.com/2012/10/pinch-me/  


2) Find Your Perfect Mascara!

This could very well become a Forrest Gump scene where I could spent the next hour or so naming all the Mascaras, there is Volumizing Mascara, Lengthening Mascara, Fiber Mascara, Blue Mascara,  Pink Mascara... very well, you get the idea...
Fact is that the shape of the wand and the type of Mascara do make a difference, whether you want a natural look, longer lashes or Full looking lashes. Look at the Beauty Departments "War of the Wands" post to see what a difference the wand alone makes! You will need to find Your perfect Mascara!

http://thebeautydepartment.com/2012/04/mascara-wands/


3) False Eye Lashes

Oh the fun! The reason I am all for it is picture number 6 in my collage which means I would need to master the individual lashes and would need to master how to apply them on the bottom line (the Beauty Departments Mini Falsies and Mastering Falsies tutorials are a great way to start) 

http://thebeautydepartment.com/2012/07/quick-tips-for-lash-strips/
http://thebeautydepartment.com/2012/09/minim-eyes-me/


Photobucket

FOLLOW COCOROSA ON BLOGLOVIN' FACEBOOK AND TWITTER

Friday, November 23, 2012

Style Feed, The World's Top Fashion Blogs selected by Susie Bubble

Photobucket
I'm in a Book, I'm in a Book, I'm in a Book


Has anyone been to Urban Outfitters lately? You might have run into a new, very blog related book by William Oliver and selected by Susie Bubble; Style Feed, The World's Top Fashion Blogs.
Style Feed is a Creative "Tour de Force" curating an eclectic mix of amazing blogs selected by Susie Bubble like the Man Repeller, Fred Butler Style, Style Rookie, the Coveteur, amlul, Dapper Kid, Disneyrollergirl, Hapsical, Park&Cube, Jak&Jil, Luxirare, Hanneli, Garance Dore .... and and... me... OMGz cocorosa izz in a bookz!

Oh, I waited so long writing this post because I find it so hard to even tell you how honored and happy I am to be featured in this book amongst these creative and original blogs and I find writing about features always so hard anywayz, I really pondered for day's about what to write!

Thank You Susie!
xoxo

ps. You Can Shopz the Bookz here, here and here!

Wednesday, November 21, 2012

My Big Beautiful Curly Hair Tutorial

Photobucket

So Many have asked me for a Hair Tutorial of my Big Curls so here I go! The team behind Toni&Guy have send me an arsenal of new products to fine tune my look even more (meaning more volume and a healthier Shine without a hair-sprayed look)

What you absolutely need for this Tutorial: Mouse, Toni&Guy Sculpting Powder, Curl Iron, Hair Spray, All other Products are a big plus to fight frizz and give you that Glamorous Shine!
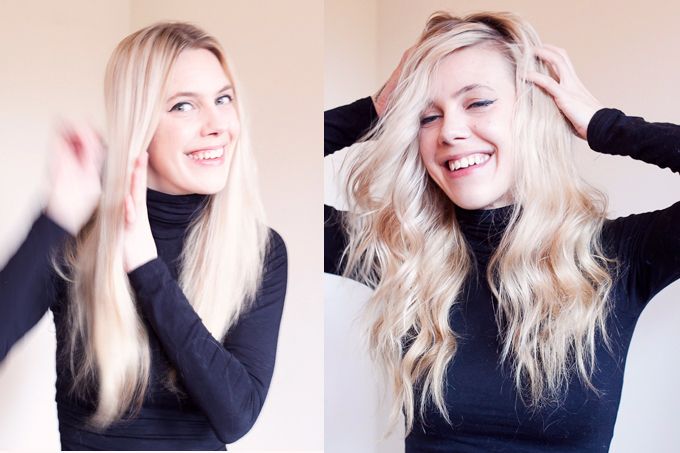
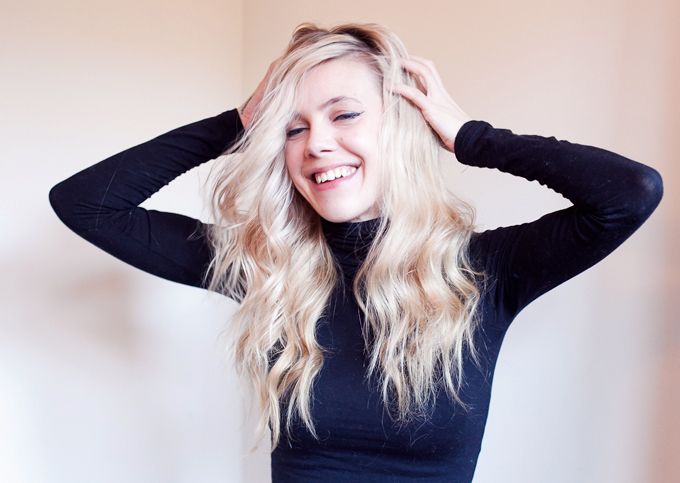
Photobucket
before and after


1) Prep Your Hair


First things first, the best way to start a good-do is to really prep your hair.
I started by washing my hair with Toni&Guy Shampoo for Damaged Hair and using the Toni&Guy Reconstruction Mask for overall well taken care off Hair!

Very important: On damp towel-dried hair I used the Spritz&Shine liquid Mouse, work in a small amount from root to tip, after I blow dried my hair. The Mouse gives my hair the perfect body and shine to start with! Plus it really helps with the curls!

Last but not least I applied a few drops of Toni&Guy Shine & Anti-Frizz serum drops to the mid-lengths and ends of my Hair and the Toni&Guy Moisturising Shine Spray for a last polish.


Photobucket
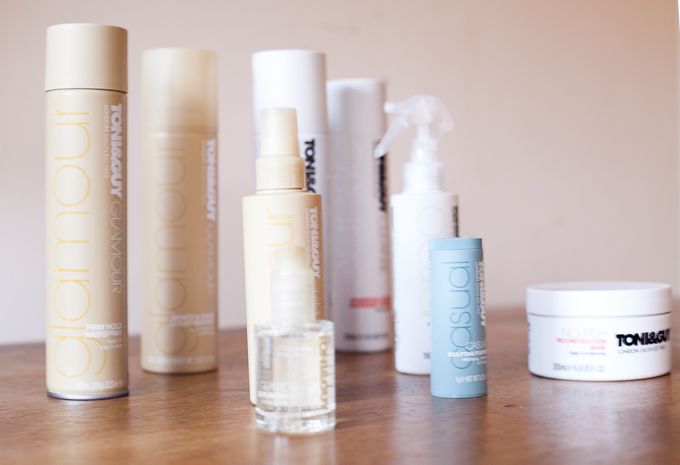
All my Toni&Guy goodies!


2) Sculpting / Volume Powder

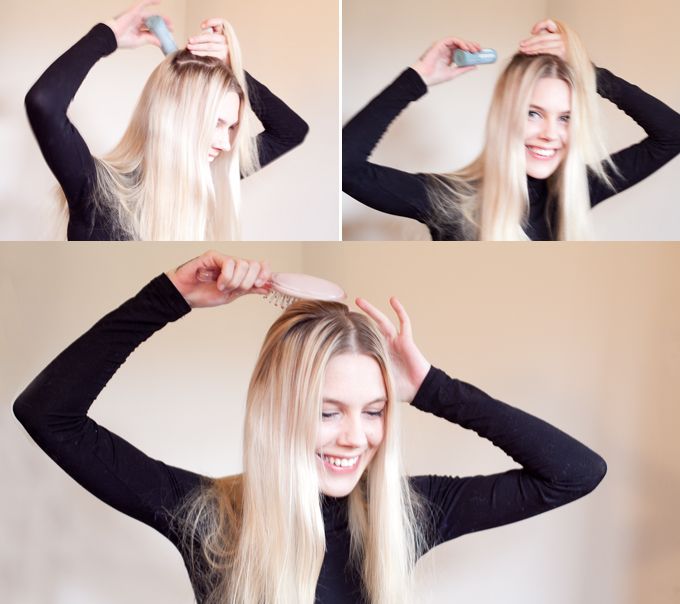
My absolute favorite Hair product in the world! I have been writing about it before and absolutely key to this tutorial since I'm really against teasing my hair!

Toni&Guy Sculpting Powder comes in a small blue tube and combats grease and creates Volume and Shape! I dust the powder directly at the roots and work it through with my fingers (I kind of massage the dusted root area so to speak)


Photobucket


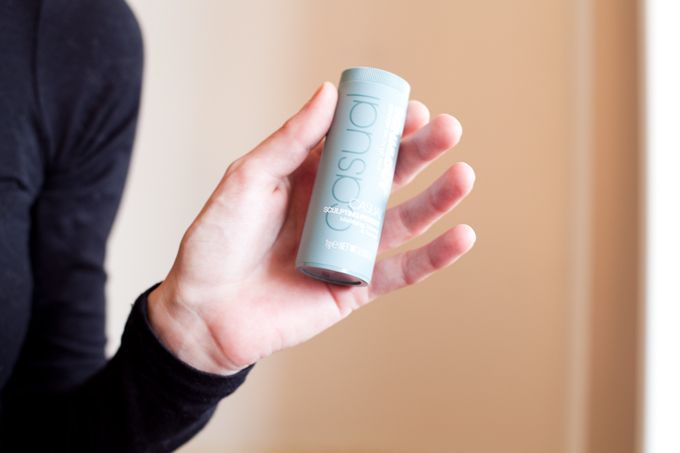
I first part my hair in a crown section and 2 front sections. (think a Bouffant or Brigitte Bardot)
Instead of teasing the hair at the crown as done in a Bouffant I use the Sculpting Powder to dust a layer at the roots (work in a horizontal strip!) then I part the hair half way (between the Crown and to where I hold the hair) and dust another strip! I also dust at the foremost section of where my "bouffant" starts! Last I gently flip my hair back using a brush or fingers. 

(Seriously, don't worry about messing this part up! Just think "Brigitte Bardot" and apply the powder at the roots where you would otherwise tease your hair!)


Photobucket


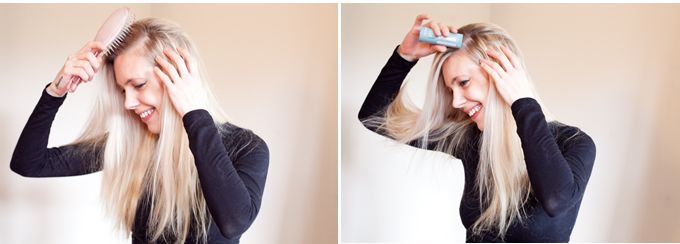
I now start to dust the front left and right parts/sections of my hair with the Sculpting Powder!
I first dust the roots in the middle section (work vertical, from the front to the back) and then I dust the roots in 2 (or 3) sections on either side! I part my hair with my fingers or using a comb or brush, don't worry about making neat side-sections, I do it very sloppy myself!

(Again! Seriously, don't worry about messing this part up! Just think "Brigitte Bardot" and apply the powder at the roots where you would otherwise tease your hair!)


Photobucket


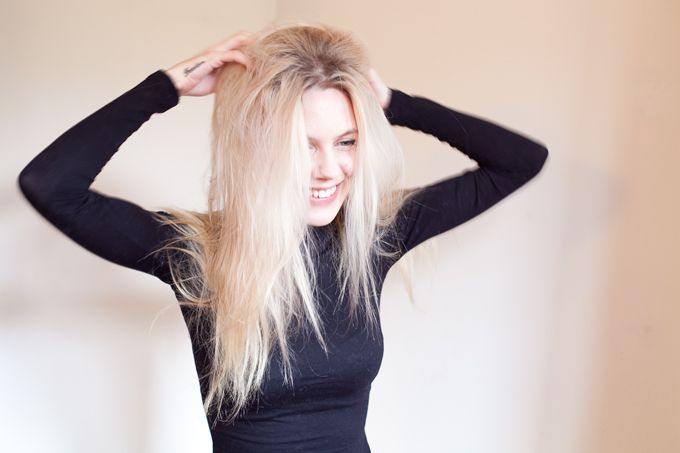
Now the Fun Part! gently Scruntch/ Massage the roots of your hair where you applied the powder, you should get a full blown Brigitte Bardot look! Without Teasing!

See, Brigitte Bardot ;)


Photobucket


3) Curl your Hair


Gently brush or comb your hair but don't comb or brush your roots through (where you dusted the Sculpting Powder) also don't worry about the volume, you will scrunch it back later! 

Pin the front sections of your hair to the side or up since we are going to curl them last, also before curling prep your hair with a heat protector! I used the Toni&Guy Heat Protection Mist!

Photobucket


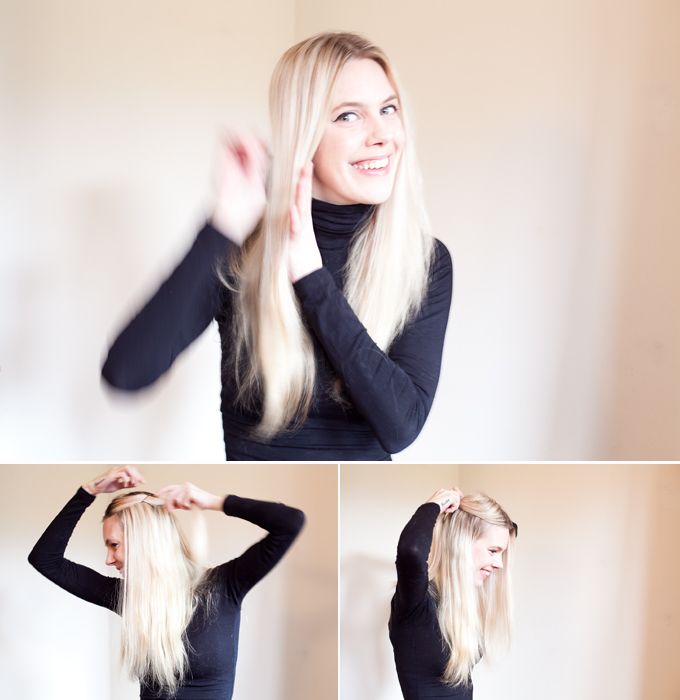
Start curling, it doesn't matter if you start curling on the right or left side of your hair as long as curl going outward! (see close-up pic) I also keep my tips/ hair ends outside of the clamp, I don't curl them since the hair ends would damage quickly because of the heat!

Photobucket

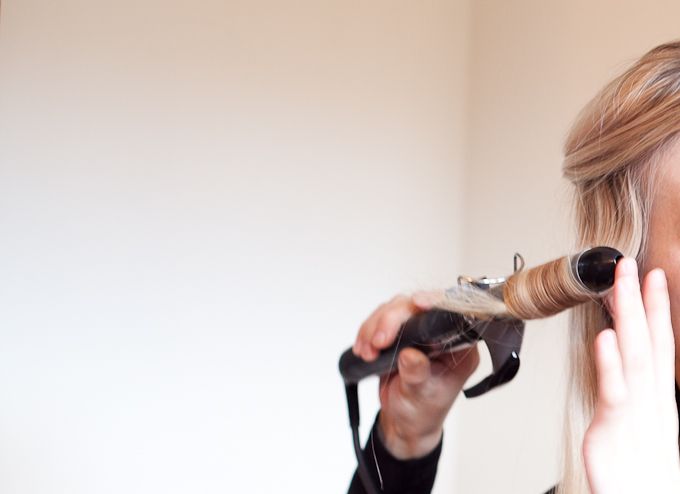
After curling the locks you can use Hair Spray on each individual lock or Spray the locks all together as you please! But you have to use Hair Spray to set the curls! I used Toni&Guy Firm Hold Hairspray. 

Now we start to curl the front locks that were pinned to the sides, after curling these I spray all the locks again!

Photobucket


4) Brush-Out the Curls


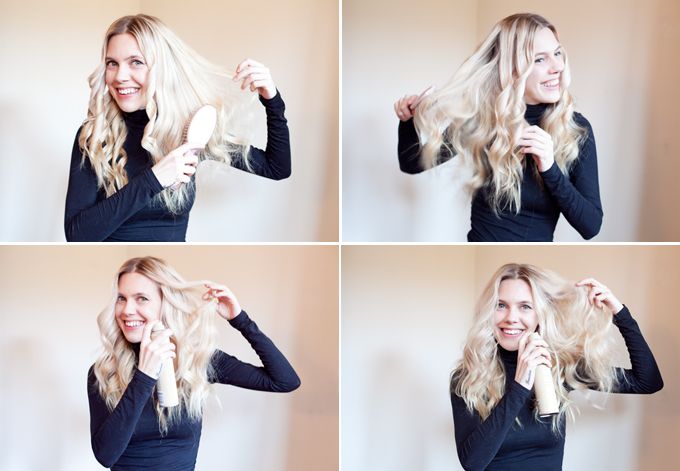
Let the hair spray set just a little bit, make sure it's dry.
We will now start Brushing out the curls! After Brushing I use Hair Spray in between and on the curls while I hold my hair up, this gives me loads of volume! Kind of setting the big fly-away fluffed up Curls!


Photobucket


5) The Side-Bang and Finishing Touch


I guess you could have made the side part before but I kind of like doing it last since I want to get it perfect while having that spontaneous fly-away feel!
I basically just flip a random side part over the either left or right side (whatever looks best on your face), this way I can really control how these locks will fall plus if really necessary I curl the side-lock-bang again (totally cheating, I know) When the side bang looks the way I like I use Hair Spray to set it although I don't really spray at my roots to keep that soft natural look and feel!


I massage the hair roots again for our Brigitte Bardot volume and use very very sparingly the Moisturising Shine Spray to areas where the fluffed up curls turned matte and scrunch them up again. 

I never ever use the Shine (Gloss) Spray near the top/roots since the Shine/Gloss tends to weigh down your hair! After glossing I use hair spray again!
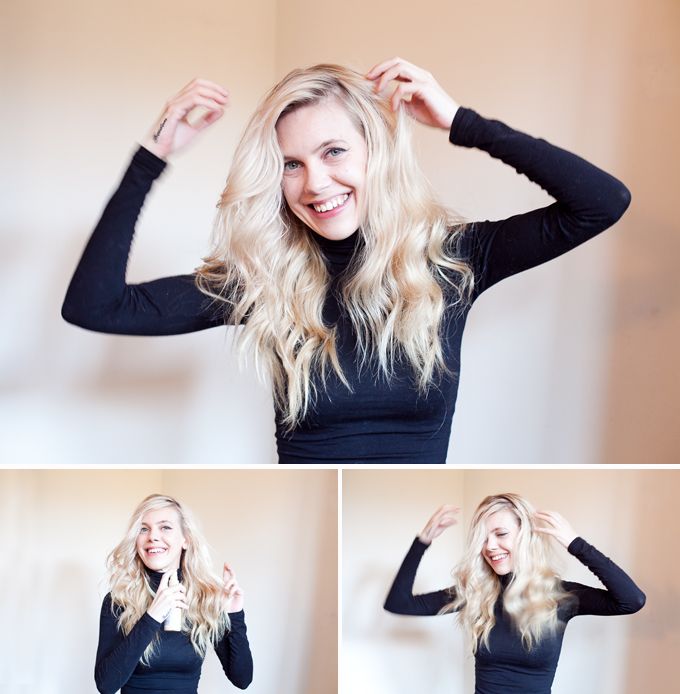
Photobucket


6) Finito!


Et Voila! 
Big Beautiful healthy looking hair with volume at the roots! You can scruntch/massage the roots of your hair during the day to re-vamp that volume!

You can find out more about all the Toni&Guy products on their website!

Photobucket

FOLLOW COCOROSA ON BLOGLOVIN' FACEBOOK AND TWITTER

Monday, November 19, 2012

OUTFIT: Casual with a Twist in London

Photobucket


A very casual look while shopping in London! (do you know where I am? a little side-street right near the TopShop) I'm wearing a casual look (and flat shoes) since I anticipated on having to go back with about 10 shopping bags (no Lie!)

Oh, the Twist part in the "Casual with a Twist"; I emphasized this look on having a low silhouette, everything that happens in this look happens far far far below the waist! The length of the coat, the bag, the rolled up trousers, the socks and Miista Studded Rula shoes. Also this kind of silhouette styling gives a "body proportion distortion" that Designers like Marc Jacobs and Phillip Lim love so much! So basically by playing with the "proportion distortion" you create an effortlessly Posh "designer" look wearing H&M only!
xoxo


Photobucket Photobucket Photobucket Photobucket Photobucket

FOLLOW COCOROSA ON BLOGLOVIN' FACEBOOK AND TWITTER

Saturday, November 17, 2012

Favorite Cat Eye Tutorials

Photobucket
 images via weheartit

It's weekend and time to master yet another skill! I'm in love with the winged 60's cat eyes but to master these you kind of need to go all "starwars-ish" where you simply need to use "the Force" basically you need talent or loads of practice, note here that I myself have no "symmetry talent" whatsoever and second to that patience is not on my list either.. But behold, there is still hope! I collected my favorite tutorials, the straight to the point tutorials that are perfect for starter catty-eyes and a perfect base for those of us who are ready to move on to the more advanced winged looks as seen in the collage (and uhm yeah, make tutorials so I can re-post them on my blog!)
x


1) Easy Cat-Eyeliner Tutorial

Indian Vanity Case brings us this great tutorial, I basically skipped the whole eyeshadow part and went straight to the liner starting at the outer corners like directed! Still practice is needed.

http://www.indianvanitycase.com/2011/07/easy-cat-eyeliner-tutorial.html

Photobucket


2) the Winged Cat Eye

I'm just in love with the illustration and the directions given are easy to follow, I guess when things are made to look easy it feels much better to take on! I found out that many people like to use a white brow liner, a pencil, folded tissue or even Scotch Tape easy to use for making the Wing when not having a steady hand!

http://www.decadediary.com/

Photobucket


3) 60's Cat Eye

Sadly this is one of those images that went viral on Tumblr and in the process the original source got lost! Real bummer since I'm actually high on credits! Non the less, I think this cat eye is perfect in its own bold minimal way! Slack on 1000 layers of eyeliner creating a thick line (almost impossible to fail here) and add the wing/tip last.

Photobucket


4) Hollywood Noir Cat Eye

Hollywood Noir's post gives use direction in products plus a great video tutorial, showing us how to do the cat-eye using a white pencil as a stencil tool!

http://www.hollywoodnoirmakeup.com/how-to-cat-eye-liner/

Photobucket


5) Get Catty

Lauren Conrad and Amy Nadine show you how to get Lauren's signature winged eye liner in this video tutorial!


6) Cat Eyes by Magic!

hahaha, this tutorial is Epic and Jane Marie is my kind of Girl! *I'm so buying Scotch Tape today and hopefully I won't rip my eye out* No steady hand needed for sure!


How to Be a Girl: Cat Eyes By Magic! from The Hairpin on Vimeo.


FOLLOW COCOROSA ON BLOGLOVIN' FACEBOOK AND TWITTER

Friday, November 16, 2012

New Tattoo!

Photobucket
Those who follow me on Twitter and Instagram already knew.. But for those who don't;
Last Wednesday I got Spontaneous Tattoo number 3! (and I love tattoos, see inspiration here and the Top 10 Fashion blogger tattoos

I was finishing up a blogpost at the Miista head-offices when Camille from ClamourforGlamour arrived from Denmark for the Miista x Muubaa event and while we were figuring out what to do that day I kind of mentioned (a bit out of the blue) that I wouldn't mind getting a new Tattoo, I guess Camille is very much like me and instead of being boring and bringing up the whole "you should think about this" process she took me to Camden where she knew a good tattoo shop and before I knew it I was inked! Freedom! Oh and don't worry about the "Spontaneous Part" I tend to do everything in life on a Whim! It's really who I am.
xoxo

ps. the Jumper is from TopShop and the leather Jacket is from Muubaa (more Muubaa and Miista coming soon! but have a preview here!)

Photobucket Photobucket Photobucket Photobucket

FOLLOW COCOROSA ON BLOGLOVIN' FACEBOOK AND TWITTER